Welcome to another entry in our monthly series on how to get the best out of Pega Process Mining. This month we're talking about Source and View creation. Specifically creating sources and views based on your Pega Platform™ data!
Getting started
Assuming you're an avid reader of this series, I'm sure you already read our entries about selecting a Case Type for analysis and configuring a Case Type for analysis. So you've obviously done all that already. Now what?
Well, now we need to:
- Set up a connector to that application
- Create a source based on that connector
- Create a view based on that source
- Start analyzing data
Setting up a connector to your Pega application
Before diving in, ensure that your Pega Platform application is at least on version 8.7.6 or 8.8.3. The connector is compatible only with these versions and later.
Setting up
To authorize the Pega Process Mining application as a client in your Pega setup, follow these steps:
- In the navigation pane of Dev Studio, click Records > Security > OAuth 2.0 Client Registration.
- In the upper-right corner, click Create.
- Enter a short description and name for your OAuth 2.0 client. Make sure to begin with a letter and use alphanumeric characters.
- Click Create and Open.
- Complete the registration fields. For more information, see Creating and configuring an OAuth 2.0 client registration.
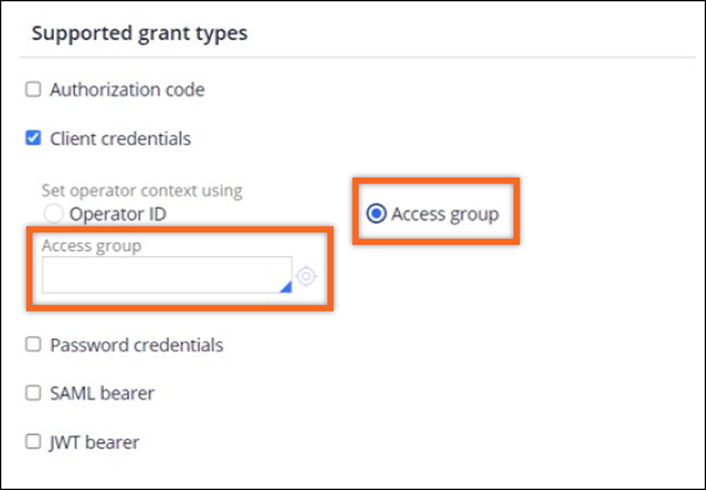
- In the Supported grant types section, select Client credentials.
- Select the operator context, and then enter a valid Operator ID or Access Group. Using Access Groups is beneficial beacuse they tie to roles and offer read-only data access.

Securing credentials
View and save the client secret:
- In the Client Credentials section, click View and download.
- Download the credentials file, and then store it securely for later use.
- In the upper-right corner, click Save.

Creating the connector
Now that you have a set of credentials that can access your platform data, you must set them up in a connector in Process Mining:
- In the header of the Pega Process Mining application, click Control panel, then click Connectors.
- Select Add New Connector.
- Enter a name and description for easy identification.
- In the Connector type list, select Pega API Adapter, and then proceed.
- Open the credentials file you saved earlier and enter the necessary details such as the domain URL, Client ID, and Client Secret.
- For API root, use the default value of prweb unless specified otherwise in your Pega application URL (the text that immediately precedes "/api.")
- In the Service Package field, choose one of the following:
- If you kept the default application service package with OAuth 2.0, leave the value as application.
- If you created a custom service package for OAuth 2.0, enter its name.

Fill in the selected connector fields.
- Test the connection to ensure that the set up is correct. A successful test displays an Available status.
- Save your new connector setup.
Creating a source based on the Pega Connector
So, you have a connector that can pull data, now you just need to pull it! To do that, set up a source based on the connector.
- In the navigation pane of Process Mining, click Sources, and then click Add New Source.
- Provide a name and description for your source:
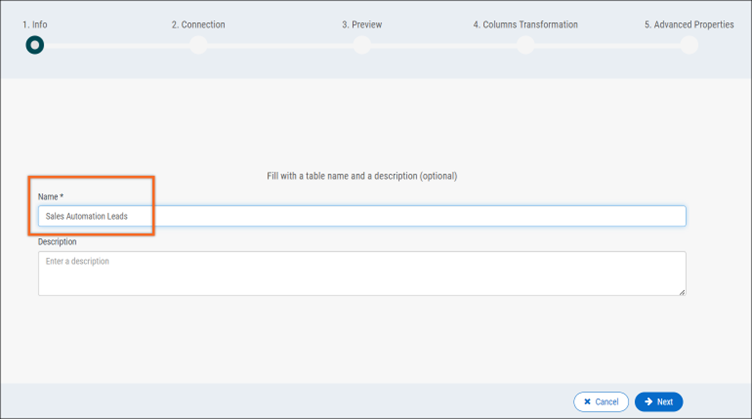
- On the Info tab, enter a name in the Name field.
- Optional: Add a brief description of what the process in this source is for.
- Click Next.

On the Info tab, the Name field is required. - On the Connection tab, click the Pega logo, and then from the list, select the connector you just created.

On the left side of the Connection tab, the Pega subtab lists Pega connectors. - In the Case Type field, select the Case Type that you want to import. Optional: To exclude certain events, clear the Include 'Status' and 'Stage' checkbox.

The Case Type field lists all of the available Case Types, based on the Pega connector. - Click the Expand icon next to Fields.

Click the Expand icon next to the Fields field to access the Pega Connector fields. - In the Pega Connector Fields dialog, select the fields you want to use. Note: Depending on your Pega Platform version, available fields might vary.

Clicking fields in the Available Fields list moves the fields to the Selected Fields list. - Click Save.
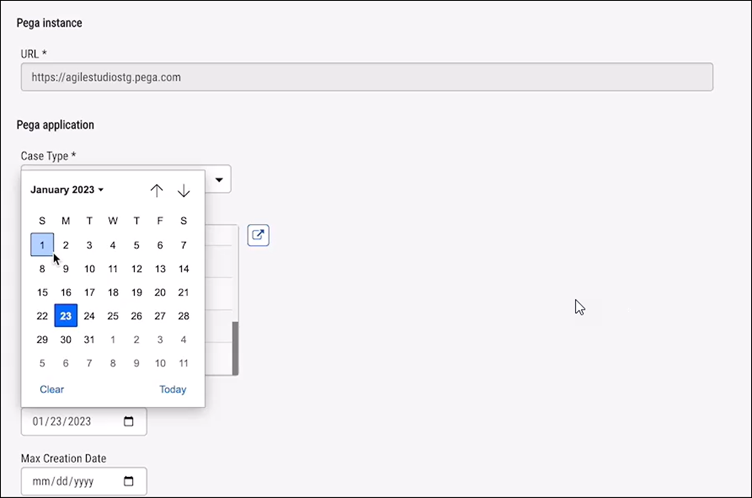
- In the Min Creation Date field, select the starting date for importing Case data by using the calendar.
- Optional: Select an end date in the Max Creation Date field.

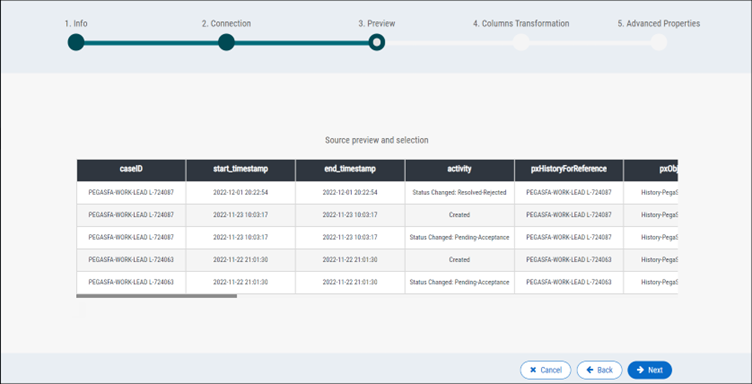
A pop-up calendar provides a way to select a minimum creation date. - Click Next, and then on the Preview tab, verify the data.

The Preview tab provides a sample of the imported fields and values. - On the Columns Transformation tab, modify or create any columns as needed.
- On the Advanced Properties tab, click Save.
- Optional: Set an update schedule to ensure that your Case Type data is always up to date.
Creating a View from your Pega Connector-based source
- In the navigation pane of Process Mining, click Views and select Add New View.
- On the Info tab, name your View, and then select the source created from the Pega connector.
- Follow the View setup wizard.
- Complete the Key Columns tab:
- Ensure that caseID is assigned as the Case ID.
- Ensure that start_Timestamp is assigned as the Timestamp.
- Ensure that activity is assigned as the Activity.
- Optional: Confirm that you can assign end_timestamp as End Timestamp to enable the analysis of activity durations.

Start Analyzing!
Now that you have a view connected to data coming from your Pega Case Type, you can get started analyzing your data and finding opportunities for improvement!
Related Resources
Don't Forget
- JOIN THE CONVERSATION on Support Center
- FOLLOW @PegaDeveloper on Twitter

